
One-Pan Breakfast Dish Highlighting Surplus Corned Beef
# Corned Beef Hash: A One-Skillet Treat
Corned beef hash is a traditional dish that combines crispy potatoes, flavorful corned beef, and eggs all in one skillet, creating a simple and fulfilling meal. This robust dish is ideal for breakfast, brunch, or even “breakfast for dinner,” and serves as a fantastic way to make use of leftovers.
## Flavor Profile
The taste of corned beef hash is a delightful mix of salty corned beef and crunchy potatoes, enhanced by the gentle sweetness of onions and bell peppers. This meal is not only hearty but also brimming with savory flavors that cater to diverse tastes.
## Why Prepare Corned Beef Hash?
A key reason to prepare corned beef hash is its adaptability in creatively using leftovers. It cooks in a single ovenproof skillet, resulting in fewer dishes to wash afterward. This makes it a perfect selection for hectic mornings or laid-back family dinners.
## Recommended Tools
To create corned beef hash, you’ll require:
– A large skillet (cast iron is ideal for even cooking)
– A medium-sized pot for boiling the potatoes
– A slotted spoon or colander to drain the potatoes
## Serving Suggestions
Corned beef hash can be enjoyed as a substantial breakfast or brunch choice. Pair it with fresh fruit or a light salad for a well-rounded meal. It’s also a wonderful option for a comforting dinner.
## Ingredient Notes
– **Corned Beef**: Utilize leftover corned beef or deli slices. Corned beef is usually a brined beef brisket, which provides a deep flavor to the dish.
– **Potatoes & Onions**: Russet potatoes are perfect for their crispiness, while yellow or sweet onions contribute sweetness. Dice them finely for uniform cooking.
– **Eggs**: Crack eggs straight into the hash and bake until firm, or top with fried or poached eggs for a different texture.
– **Variations**: Add some heat with cayenne or diced jalapeños, or mix in cheese by sprinkling shredded cheddar during the last few minutes of baking. For extra nutrition, mix in sautéed mushrooms or zucchini.
## How to Make Corned Beef Hash
1. **Boil the Potatoes**: Begin by boiling the potatoes until they’re tender, about 11-14 minutes.
2. **Cook the Hash**: In a skillet, melt butter and sauté the corned beef, onions, and peppers until they’re browned.
3. **Combine Ingredients**: Mix in the boiled potatoes and cook until they start to brown.
4. **Add Eggs**: Make wells in the hash and crack an egg into each well.
5. **Bake**: Put the skillet in a preheated oven at 375°F for 12-15 minutes until the eggs reach your desired doneness.
### Tips for Ideal Hash
– Let drained potatoes steam-dry for a few minutes.
– Use a broad pan to avoid overcrowding, which helps achieve a crispy texture.
– If the pan appears dry, add butter around the edges instead of stirring frequently.
– Cut corned beef into small pieces for even warming and crisping.
– Take the skillet out when the eggs are nearly done, as they will keep cooking from residual heat.
– For extra crispiness, broil the hash for 30-60 seconds after baking.
## Corned Beef Hash Leftovers
Any leftover corned beef hash can be transformed into a scrumptious breakfast burrito with scrambled eggs and cheese. Store the hash (without eggs) in an airtight container in the refrigerator for up to 4 days, or freeze it for as long as 3 months. Thaw overnight in the fridge and re-crisp in a skillet with a little butter.
## Conclusion
Corned beef hash is a flexible and fulfilling dish that makes fantastic use of leftovers. Its blend of flavors and textures, coupled with the simplicity of preparation, makes it a beloved choice for many families. Whether enjoyed for breakfast, brunch, or dinner, this one-skillet dish is sure to satisfy.

Easy Shrimp and Rice Skillet Dish
Alex & Sonja Overhiser: The Culinary Partners Behind A Couple Cooks
Alex and Sonja Overhiser represent the energetic pair behind the renowned food blog, A Couple Cooks. As writers of two celebrated cookbooks and parents managing the hectic realm of family life, they have successfully established a distinctive niche in the culinary scene by sharing their enthusiasm for uncomplicated, seasonal cooking.
Their adventure commenced in 2010 with the launch of A Couple Cooks, a platform devoted to sharing straightforward recipes that honor the pleasure of cooking. Throughout the years, the blog has transformed into a comprehensive hub for home chefs, featuring thousands of original recipes, valuable cooking insights, and useful meal planning suggestions. Each recipe is carefully designed and photographed by Alex and Sonja, ensuring their individual touch is noticeable in every entry.
What distinguishes Alex and Sonja is their dedication to crafting recipes that are not only tasty but also attainable for cooks at any ability level. They prioritize the use of seasonal produce, which not only enriches the flavor of their dishes but also encourages sustainable cooking habits. Their recipes vary from quick weeknight meals to detailed dishes ideal for entertaining, appealing to a broad audience in search of culinary ideas.
Besides their blog, Alex and Sonja have written two cookbooks that delve deeper into their cooking ethos. These books are packed with recipes that embody their passion for nutritious, flavorful cuisine and aim to inspire readers to approach cooking as a delightful and fulfilling venture.
As busy parents, Alex and Sonja recognize the obstacles of preparing meals for a family. They test all their recipes with their own children, ensuring that every dish is nutritious and kid-approved. This hands-on strategy resonates with many of their followers, who value the couple’s practical suggestions and relatable family anecdotes.
Through A Couple Cooks, Alex and Sonja Overhiser have cultivated a lively community of food lovers who share their enthusiasm for cooking. Their commitment to producing high-quality content and their sincere passion for the culinary arts continue to motivate numerous home cooks to discover the pleasures of cooking together.

Braised Chicken in Garlic Herb Sauce: A Single-Pot Recipe
### Braised Chicken with Crispy Skin and Flavorful Pan Sauce
This braised chicken meal offers an excellent mix of crispy skin, succulent meat, and a rich, delicious pan sauce. The one-pot technique not only streamlines the cooking experience but also guarantees that you’ll produce restaurant-quality outcomes straight from your oven.
#### Flavor Profile
The dish is enriched by the fragrant combination of herbs and sweet onions that cook together with the pan drippings, resulting in a warm and rich taste.
#### Why Make It
With an uncomplicated searing step followed by braising in the same pot, this recipe reduces dishwashing while guaranteeing the chicken stays moist and tender.
#### Serving Suggestions
This braised chicken goes perfectly with:
– Mashed potatoes
– Buttered noodles
– Rice
– Roasted vegetables
These accompaniments are ideal for soaking up the delightful pan jus.
### Ingredients You’ll Need
– **Chicken**: Opt for bone-in, skin-on thighs or drumsticks for optimal juiciness.
– **Seasoning**: Utilize seasoned salt for ease, or replace it with kosher salt, paprika, and garlic powder. Fresh herbs such as rosemary or Italian seasoning can enhance the fragrance.
– **Braising Liquid**: Low-sodium broth helps manage salt content, while apple juice introduces a touch of sweetness. A dash of white wine can uplift the savory flavors.
– **Variations**: For a more robust dish, think about adding mushrooms or carrots. A teaspoon of Dijon mustard can bring a gentle tang, and a squeeze of lemon upon serving brightens the taste.
### How to Braise Chicken
1. **Prepare the Chicken**: Dry the chicken thoroughly and season it generously.
2. **Sear the Chicken**: In a skillet, brown the chicken in butter, then set it aside.
3. **Sauté Aromatics**: In the same skillet, sauté onions, garlic, and herbs. Pour in broth and apple juice, scraping up any browned bits.
4. **Braise**: Place the chicken back into the skillet, cover it, and bake.
### Tips for Perfect Braising
– Make sure the chicken is dry for effective browning.
– Refrain from moving the chicken during searing to obtain a golden skin.
– Keep the braising liquid shallow, about one-third up the chicken.
– Balance sweetness with a sprinkle of salt or vinegar.
– Use an instant-read thermometer; chicken is finished at 165°F.
– For added crispy skin, uncover the pot early and rotate for even browning.
### Leftovers That Stay Juicy
Store leftovers in an airtight container in the refrigerator for up to 4 days or freeze for up to 3 months. Reheat in a covered skillet with a splash of broth or in a 325°F oven, uncovering for the last few minutes to restore the crispiness of the skin.
### Conclusion
This braised chicken recipe is not only straightforward to make but also provides a warm, comforting meal that is bound to impress. Pair it with your preferred sides and relish the delightful flavors!

Simple and Genuine Mapo Tofu Recipe
# I’m hooked on the enchanting blend of silky smooth tofu and zesty spicy pork. If you’re in the loop, you understand: mapo tofu.
## What is mapo tofu?
Mapo tofu is a renowned Sichuan dish featuring a generous amount of *mala*, the distinctive numbing spiciness characteristic of exceptional Sichuan cuisine. If you’re unacquainted with Sichuan fare, the vibrant red color may intimidate you, but once you overcome that heat, you’ll crave it again!
If you’re fond of tofu and enjoy spice, mapo tofu is sure to delight you as well. And if extreme spice isn’t your thing, the beauty of this dish is that you can tweak the spiciness by adjusting the amount of Sichuan pepper you use as a finishing touch.
For those unfamiliar, here’s a brief overview: mapo tofu is a widely loved Chinese dish originating from the Sichuan province. It features soft tofu immersed in a spicy, bright red sauce accompanied by ground pork. The dish’s name roughly means “pockmarked grandma’s tofu,” akin to your grandmother’s special tofu. Numerous variations exist, but this is a classic, authentic mapo tofu recipe.
## How to prepare authentic mapo tofu
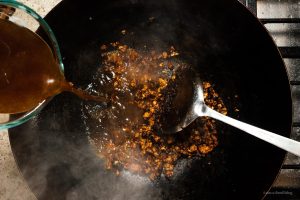
With your ingredients ready, the recipe is quite straightforward. Begin by blanching your tofu in salted water. Next, it’s simply a matter of frying the pork and [doubanjiang](https://iamafoodblog.com/doubanjiang-sichuan-spicy-bean-paste/), incorporating chicken stock, and thickening it. Sautéing the doubanjiang to release its oils enhances the flavor and aroma. The sauce thickens with cornstarch, resulting in a glossy, golden mixture that clings flawlessly to your tofu cubes. It pairs beautifully with rice.
1. **Blanch the tofu.** Lightly simmer the tofu in salted water over low heat, then take the pot off the heat and let it sit in its salty water.
2. **Fry.** Cook the pork until crispy, then mix in the doubanjiang and fry it to release its spicy red oils. Add the garlic and ginger.
3. **Sauce.** Combine the chicken stock and soy sauce, bringing the mixture to a simmer. Incorporate the drained tofu cubes and stir in a cornstarch slurry. Simmer until the sauce is thick and glossy, and you’re all set!
## Key Ingredients
This dish centers around two essential ingredients: chili bean paste (doubanjiang) and Sichuan peppercorns. Both can be found at your local Asian grocery store. The rest of the ingredients are fairly common.
– **Doubanjiang.** Doubanjiang is one of the trickiest (or second trickiest) ingredients to source for authentic mapo tofu, but it’s definitely worth it. If your local Asian market doesn’t carry it, [you can find it online.](https://amzn.to/3N9NVFf) Read more about [doubanjiang here](https://iamafoodblog.com/doubanjiang-sichuan-spicy-bean-paste/) or below.
– **Sichuan peppercorns.** As for Sichuan peppercorns, you can purchase pre-ground powder, but if possible, opt for whole Sichuan peppercorns and toast and grind them on your own. The flavor will be much fresher and more pronounced.
– **Soft tofu.** Soft tofu is crucial for authentic mapo tofu. It should be smooth, rich, and soft.
– **Ground pork.** This dish includes a small amount of ground pork, just enough to enhance the tofu.
– **Ginger and garlic.** Ginger and garlic contribute a burst of aroma.
– **Chicken stock.** Chicken stock forms the bulk of the sauce.
– **Cornstarch.** Cornstarch is used as a thickener to ensure the sauce is silky and smooth.
– **Soy sauce.** Just a hint of soy adds extra umami.
## Doubanjiang
With certain authentic recipes, there’s usually that one ingredient you need to hunt down extensively. You might be wandering the aisles questioning if it’s really worth the effort. Allow me to assure you, it absolutely is! Doubanjiang is a spicy fermented blend of soy and broad beans. It’s referred to as the heart of Sichuan cuisine and is responsible for giving your mapo tofu that beautiful red color. When shopping, aim for the Pixian variety if available.

7-Day Nutritious Meal Plan for March 16-22
**7-Day Nutritious Meal Schedule for March 16-22**
Upholding a well-rounded diet is crucial for comprehensive health and vitality. As we move into spring, it’s an ideal moment to add fresh, seasonal produce into your dishes. Here’s a 7-day nutritious meal schedule to assist you from March 16-22, emphasizing nourishment, diversity, and flavor.
**Day 1: March 16**
– **Breakfast:** Greek yogurt drizzled with honey, walnuts, and assorted berries.
– **Lunch:** Grilled chicken salad featuring spinach, cherry tomatoes, cucumbers, and balsamic dressing.
– **Dinner:** Oven-baked salmon paired with quinoa and steamed asparagus.
– **Snack:** Apple slices accompanied by almond butter.
**Day 2: March 17**
– **Breakfast:** Oatmeal garnished with banana slices and a dash of cinnamon.
– **Lunch:** Turkey and avocado wrap using whole grain tortilla and mixed greens.
– **Dinner:** Lentil soup served with a slice of whole-grain bread.
– **Snack:** Carrot sticks dipped in hummus.
**Day 3: March 18**
– **Breakfast:** Smoothie blending spinach, banana, almond milk, and chia seeds.
– **Lunch:** Quinoa and black bean salad dressed with lime vinaigrette.
– **Dinner:** Grilled shrimp tacos served with cabbage slaw and avocado.
– **Snack:** A handful of assorted nuts.
**Day 4: March 19**
– **Breakfast:** Whole grain toast topped with mashed avocado and a poached egg.
– **Lunch:** Bell peppers stuffed with spinach and feta.
– **Dinner:** Stir-fried tofu with broccoli, bell peppers, and brown rice.
– **Snack:** Greek yogurt with a drizzle of honey.
**Day 5: March 20**
– **Breakfast:** Chia seed pudding mixed with almond milk and seasonal berries.
– **Lunch:** Chicken Caesar salad with a light dressing.
– **Dinner:** Baked cod alongside sweet potato wedges and green beans.
– **Snack:** Celery sticks paired with peanut butter.
**Day 6: March 21**
– **Breakfast:** Scrambled eggs with spinach and tomatoes.
– **Lunch:** Whole grain pasta salad featuring cherry tomatoes, olives, and feta.
– **Dinner:** Beef stir-fry with assorted vegetables and quinoa.
– **Snack:** Rice cakes topped with cottage cheese.
**Day 7: March 22**
– **Breakfast:** Pancakes made with almond flour and adorned with fresh fruit.
– **Lunch:** Grilled vegetable wrap with hummus.
– **Dinner:** Roasted chicken served with rosemary potatoes and steamed broccoli.
– **Snack:** Dark chocolate square along with a handful of almonds.
**Success Tips:**
– **Hydration:** Ensure you drink ample water throughout the day.
– **Portion Control:** Be conscious of portion sizes to prevent overeating.
– **Preparation:** Prepare meals ahead of time to save time and alleviate stress.
– **Variety:** Include a diverse range of fruits, vegetables, proteins, and grains to guarantee a balanced nutrient intake.
This meal schedule offers a broad spectrum of tastes and nutrients, keeping you energized and healthy all week long. Savor the season’s fresh ingredients and maximize your meals!

One-Pan Breakfast Dish Highlighting Surplus Corned Beef
# Corned Beef Hash: A One-Skillet Treat
Corned beef hash is a traditional dish that combines crispy potatoes, flavorful corned beef, and eggs all in one skillet, creating a simple and fulfilling meal. This robust dish is ideal for breakfast, brunch, or even “breakfast for dinner,” and serves as a fantastic way to make use of leftovers.
## Flavor Profile
The taste of corned beef hash is a delightful mix of salty corned beef and crunchy potatoes, enhanced by the gentle sweetness of onions and bell peppers. This meal is not only hearty but also brimming with savory flavors that cater to diverse tastes.
## Why Prepare Corned Beef Hash?
A key reason to prepare corned beef hash is its adaptability in creatively using leftovers. It cooks in a single ovenproof skillet, resulting in fewer dishes to wash afterward. This makes it a perfect selection for hectic mornings or laid-back family dinners.
## Recommended Tools
To create corned beef hash, you’ll require:
– A large skillet (cast iron is ideal for even cooking)
– A medium-sized pot for boiling the potatoes
– A slotted spoon or colander to drain the potatoes
## Serving Suggestions
Corned beef hash can be enjoyed as a substantial breakfast or brunch choice. Pair it with fresh fruit or a light salad for a well-rounded meal. It’s also a wonderful option for a comforting dinner.
## Ingredient Notes
– **Corned Beef**: Utilize leftover corned beef or deli slices. Corned beef is usually a brined beef brisket, which provides a deep flavor to the dish.
– **Potatoes & Onions**: Russet potatoes are perfect for their crispiness, while yellow or sweet onions contribute sweetness. Dice them finely for uniform cooking.
– **Eggs**: Crack eggs straight into the hash and bake until firm, or top with fried or poached eggs for a different texture.
– **Variations**: Add some heat with cayenne or diced jalapeños, or mix in cheese by sprinkling shredded cheddar during the last few minutes of baking. For extra nutrition, mix in sautéed mushrooms or zucchini.
## How to Make Corned Beef Hash
1. **Boil the Potatoes**: Begin by boiling the potatoes until they’re tender, about 11-14 minutes.
2. **Cook the Hash**: In a skillet, melt butter and sauté the corned beef, onions, and peppers until they’re browned.
3. **Combine Ingredients**: Mix in the boiled potatoes and cook until they start to brown.
4. **Add Eggs**: Make wells in the hash and crack an egg into each well.
5. **Bake**: Put the skillet in a preheated oven at 375°F for 12-15 minutes until the eggs reach your desired doneness.
### Tips for Ideal Hash
– Let drained potatoes steam-dry for a few minutes.
– Use a broad pan to avoid overcrowding, which helps achieve a crispy texture.
– If the pan appears dry, add butter around the edges instead of stirring frequently.
– Cut corned beef into small pieces for even warming and crisping.
– Take the skillet out when the eggs are nearly done, as they will keep cooking from residual heat.
– For extra crispiness, broil the hash for 30-60 seconds after baking.
## Corned Beef Hash Leftovers
Any leftover corned beef hash can be transformed into a scrumptious breakfast burrito with scrambled eggs and cheese. Store the hash (without eggs) in an airtight container in the refrigerator for up to 4 days, or freeze it for as long as 3 months. Thaw overnight in the fridge and re-crisp in a skillet with a little butter.
## Conclusion
Corned beef hash is a flexible and fulfilling dish that makes fantastic use of leftovers. Its blend of flavors and textures, coupled with the simplicity of preparation, makes it a beloved choice for many families. Whether enjoyed for breakfast, brunch, or dinner, this one-skillet dish is sure to satisfy.
Read More
Easy Shrimp and Rice Skillet Dish
Alex & Sonja Overhiser: The Culinary Partners Behind A Couple Cooks
Alex and Sonja Overhiser represent the energetic pair behind the renowned food blog, A Couple Cooks. As writers of two celebrated cookbooks and parents managing the hectic realm of family life, they have successfully established a distinctive niche in the culinary scene by sharing their enthusiasm for uncomplicated, seasonal cooking.
Their adventure commenced in 2010 with the launch of A Couple Cooks, a platform devoted to sharing straightforward recipes that honor the pleasure of cooking. Throughout the years, the blog has transformed into a comprehensive hub for home chefs, featuring thousands of original recipes, valuable cooking insights, and useful meal planning suggestions. Each recipe is carefully designed and photographed by Alex and Sonja, ensuring their individual touch is noticeable in every entry.
What distinguishes Alex and Sonja is their dedication to crafting recipes that are not only tasty but also attainable for cooks at any ability level. They prioritize the use of seasonal produce, which not only enriches the flavor of their dishes but also encourages sustainable cooking habits. Their recipes vary from quick weeknight meals to detailed dishes ideal for entertaining, appealing to a broad audience in search of culinary ideas.
Besides their blog, Alex and Sonja have written two cookbooks that delve deeper into their cooking ethos. These books are packed with recipes that embody their passion for nutritious, flavorful cuisine and aim to inspire readers to approach cooking as a delightful and fulfilling venture.
As busy parents, Alex and Sonja recognize the obstacles of preparing meals for a family. They test all their recipes with their own children, ensuring that every dish is nutritious and kid-approved. This hands-on strategy resonates with many of their followers, who value the couple’s practical suggestions and relatable family anecdotes.
Through A Couple Cooks, Alex and Sonja Overhiser have cultivated a lively community of food lovers who share their enthusiasm for cooking. Their commitment to producing high-quality content and their sincere passion for the culinary arts continue to motivate numerous home cooks to discover the pleasures of cooking together.
Read More
Braised Chicken in Garlic Herb Sauce: A Single-Pot Recipe
### Braised Chicken with Crispy Skin and Flavorful Pan Sauce
This braised chicken meal offers an excellent mix of crispy skin, succulent meat, and a rich, delicious pan sauce. The one-pot technique not only streamlines the cooking experience but also guarantees that you’ll produce restaurant-quality outcomes straight from your oven.
#### Flavor Profile
The dish is enriched by the fragrant combination of herbs and sweet onions that cook together with the pan drippings, resulting in a warm and rich taste.
#### Why Make It
With an uncomplicated searing step followed by braising in the same pot, this recipe reduces dishwashing while guaranteeing the chicken stays moist and tender.
#### Serving Suggestions
This braised chicken goes perfectly with:
– Mashed potatoes
– Buttered noodles
– Rice
– Roasted vegetables
These accompaniments are ideal for soaking up the delightful pan jus.
### Ingredients You’ll Need
– **Chicken**: Opt for bone-in, skin-on thighs or drumsticks for optimal juiciness.
– **Seasoning**: Utilize seasoned salt for ease, or replace it with kosher salt, paprika, and garlic powder. Fresh herbs such as rosemary or Italian seasoning can enhance the fragrance.
– **Braising Liquid**: Low-sodium broth helps manage salt content, while apple juice introduces a touch of sweetness. A dash of white wine can uplift the savory flavors.
– **Variations**: For a more robust dish, think about adding mushrooms or carrots. A teaspoon of Dijon mustard can bring a gentle tang, and a squeeze of lemon upon serving brightens the taste.
### How to Braise Chicken
1. **Prepare the Chicken**: Dry the chicken thoroughly and season it generously.
2. **Sear the Chicken**: In a skillet, brown the chicken in butter, then set it aside.
3. **Sauté Aromatics**: In the same skillet, sauté onions, garlic, and herbs. Pour in broth and apple juice, scraping up any browned bits.
4. **Braise**: Place the chicken back into the skillet, cover it, and bake.
### Tips for Perfect Braising
– Make sure the chicken is dry for effective browning.
– Refrain from moving the chicken during searing to obtain a golden skin.
– Keep the braising liquid shallow, about one-third up the chicken.
– Balance sweetness with a sprinkle of salt or vinegar.
– Use an instant-read thermometer; chicken is finished at 165°F.
– For added crispy skin, uncover the pot early and rotate for even browning.
### Leftovers That Stay Juicy
Store leftovers in an airtight container in the refrigerator for up to 4 days or freeze for up to 3 months. Reheat in a covered skillet with a splash of broth or in a 325°F oven, uncovering for the last few minutes to restore the crispiness of the skin.
### Conclusion
This braised chicken recipe is not only straightforward to make but also provides a warm, comforting meal that is bound to impress. Pair it with your preferred sides and relish the delightful flavors!
Simple and Genuine Mapo Tofu Recipe
# I’m hooked on the enchanting blend of silky smooth tofu and zesty spicy pork. If you’re in the loop, you understand: mapo tofu.
## What is mapo tofu?
Mapo tofu is a renowned Sichuan dish featuring a generous amount of *mala*, the distinctive numbing spiciness characteristic of exceptional Sichuan cuisine. If you’re unacquainted with Sichuan fare, the vibrant red color may intimidate you, but once you overcome that heat, you’ll crave it again!
If you’re fond of tofu and enjoy spice, mapo tofu is sure to delight you as well. And if extreme spice isn’t your thing, the beauty of this dish is that you can tweak the spiciness by adjusting the amount of Sichuan pepper you use as a finishing touch.
For those unfamiliar, here’s a brief overview: mapo tofu is a widely loved Chinese dish originating from the Sichuan province. It features soft tofu immersed in a spicy, bright red sauce accompanied by ground pork. The dish’s name roughly means “pockmarked grandma’s tofu,” akin to your grandmother’s special tofu. Numerous variations exist, but this is a classic, authentic mapo tofu recipe.
## How to prepare authentic mapo tofu
With your ingredients ready, the recipe is quite straightforward. Begin by blanching your tofu in salted water. Next, it’s simply a matter of frying the pork and [doubanjiang](https://iamafoodblog.com/doubanjiang-sichuan-spicy-bean-paste/), incorporating chicken stock, and thickening it. Sautéing the doubanjiang to release its oils enhances the flavor and aroma. The sauce thickens with cornstarch, resulting in a glossy, golden mixture that clings flawlessly to your tofu cubes. It pairs beautifully with rice.
1. **Blanch the tofu.** Lightly simmer the tofu in salted water over low heat, then take the pot off the heat and let it sit in its salty water.
2. **Fry.** Cook the pork until crispy, then mix in the doubanjiang and fry it to release its spicy red oils. Add the garlic and ginger.
3. **Sauce.** Combine the chicken stock and soy sauce, bringing the mixture to a simmer. Incorporate the drained tofu cubes and stir in a cornstarch slurry. Simmer until the sauce is thick and glossy, and you’re all set!
## Key Ingredients
This dish centers around two essential ingredients: chili bean paste (doubanjiang) and Sichuan peppercorns. Both can be found at your local Asian grocery store. The rest of the ingredients are fairly common.
– **Doubanjiang.** Doubanjiang is one of the trickiest (or second trickiest) ingredients to source for authentic mapo tofu, but it’s definitely worth it. If your local Asian market doesn’t carry it, [you can find it online.](https://amzn.to/3N9NVFf) Read more about [doubanjiang here](https://iamafoodblog.com/doubanjiang-sichuan-spicy-bean-paste/) or below.
– **Sichuan peppercorns.** As for Sichuan peppercorns, you can purchase pre-ground powder, but if possible, opt for whole Sichuan peppercorns and toast and grind them on your own. The flavor will be much fresher and more pronounced.
– **Soft tofu.** Soft tofu is crucial for authentic mapo tofu. It should be smooth, rich, and soft.
– **Ground pork.** This dish includes a small amount of ground pork, just enough to enhance the tofu.
– **Ginger and garlic.** Ginger and garlic contribute a burst of aroma.
– **Chicken stock.** Chicken stock forms the bulk of the sauce.
– **Cornstarch.** Cornstarch is used as a thickener to ensure the sauce is silky and smooth.
– **Soy sauce.** Just a hint of soy adds extra umami.
## Doubanjiang
With certain authentic recipes, there’s usually that one ingredient you need to hunt down extensively. You might be wandering the aisles questioning if it’s really worth the effort. Allow me to assure you, it absolutely is! Doubanjiang is a spicy fermented blend of soy and broad beans. It’s referred to as the heart of Sichuan cuisine and is responsible for giving your mapo tofu that beautiful red color. When shopping, aim for the Pixian variety if available.
Read More
7-Day Nutritious Meal Plan for March 16-22
**7-Day Nutritious Meal Schedule for March 16-22**
Upholding a well-rounded diet is crucial for comprehensive health and vitality. As we move into spring, it’s an ideal moment to add fresh, seasonal produce into your dishes. Here’s a 7-day nutritious meal schedule to assist you from March 16-22, emphasizing nourishment, diversity, and flavor.
**Day 1: March 16**
– **Breakfast:** Greek yogurt drizzled with honey, walnuts, and assorted berries.
– **Lunch:** Grilled chicken salad featuring spinach, cherry tomatoes, cucumbers, and balsamic dressing.
– **Dinner:** Oven-baked salmon paired with quinoa and steamed asparagus.
– **Snack:** Apple slices accompanied by almond butter.
**Day 2: March 17**
– **Breakfast:** Oatmeal garnished with banana slices and a dash of cinnamon.
– **Lunch:** Turkey and avocado wrap using whole grain tortilla and mixed greens.
– **Dinner:** Lentil soup served with a slice of whole-grain bread.
– **Snack:** Carrot sticks dipped in hummus.
**Day 3: March 18**
– **Breakfast:** Smoothie blending spinach, banana, almond milk, and chia seeds.
– **Lunch:** Quinoa and black bean salad dressed with lime vinaigrette.
– **Dinner:** Grilled shrimp tacos served with cabbage slaw and avocado.
– **Snack:** A handful of assorted nuts.
**Day 4: March 19**
– **Breakfast:** Whole grain toast topped with mashed avocado and a poached egg.
– **Lunch:** Bell peppers stuffed with spinach and feta.
– **Dinner:** Stir-fried tofu with broccoli, bell peppers, and brown rice.
– **Snack:** Greek yogurt with a drizzle of honey.
**Day 5: March 20**
– **Breakfast:** Chia seed pudding mixed with almond milk and seasonal berries.
– **Lunch:** Chicken Caesar salad with a light dressing.
– **Dinner:** Baked cod alongside sweet potato wedges and green beans.
– **Snack:** Celery sticks paired with peanut butter.
**Day 6: March 21**
– **Breakfast:** Scrambled eggs with spinach and tomatoes.
– **Lunch:** Whole grain pasta salad featuring cherry tomatoes, olives, and feta.
– **Dinner:** Beef stir-fry with assorted vegetables and quinoa.
– **Snack:** Rice cakes topped with cottage cheese.
**Day 7: March 22**
– **Breakfast:** Pancakes made with almond flour and adorned with fresh fruit.
– **Lunch:** Grilled vegetable wrap with hummus.
– **Dinner:** Roasted chicken served with rosemary potatoes and steamed broccoli.
– **Snack:** Dark chocolate square along with a handful of almonds.
**Success Tips:**
– **Hydration:** Ensure you drink ample water throughout the day.
– **Portion Control:** Be conscious of portion sizes to prevent overeating.
– **Preparation:** Prepare meals ahead of time to save time and alleviate stress.
– **Variety:** Include a diverse range of fruits, vegetables, proteins, and grains to guarantee a balanced nutrient intake.
This meal schedule offers a broad spectrum of tastes and nutrients, keeping you energized and healthy all week long. Savor the season’s fresh ingredients and maximize your meals!
Read More
Homemade Fried Rice with Steak Recipe Better than Takeout
# Steak Fried Rice: A Quick and Tasty Dinner
Steak Fried Rice is a scrumptious dish that turns leftover steak into a fulfilling meal that reminds you of takeout. This recipe mixes lightly toasted cold rice with tender steak, peas, carrots, and a garlicky ginger-soy finish, creating a speedy and flavorful choice for dinner, ready in approximately 25 minutes.
## Flavor Profile
The taste of Steak Fried Rice is a balanced mix of savory steak, gently browned rice with crisp edges, sweet peas, and carrots, all elevated by a vibrant garlicky-gingery finish. This dish is not only tasty but also adaptable, offering various ingredient swaps depending on personal taste.
## Time-Saving Tips
– **Use Leftover Steak**: Rather than preparing new steak, make use of leftover steak to save time and minimize food waste.
– **Sear in Batches**: Searing the steak in batches guarantees it stays browned and juicy instead of steaming.
## Serving Suggestions
Steak Fried Rice can be enjoyed by itself or complemented with a light side dish, like a simple cucumber salad or steamed edamame, for a refreshing touch.
## Best Ingredients for Fried Rice
– **Steak**: Cut the steak thinly against the grain. If using leftover steak, just warm it at the end.
– **Vegetables**: Frozen peas and carrots are great options, but feel free to swap them with diced mushrooms, zucchini, snap peas, or bell pepper for additional color and flavor.
– **Soy Sauce**: Begin with a small quantity and modify to taste. For a gluten-free alternative, tamari or coconut aminos work well.
– **Toasted Sesame Oil**: Incorporate this at the end for a nutty scent; a little is sufficient.
– **Variations**: For a sweet-savory flavor, add pineapple, or heat it up with sriracha or chili crisp. Top with sesame seeds, extra green onion tops, or a squeeze of lime juice for extra flavor.
## How to Make Steak Fried Rice
1. **Scramble Eggs**: In a skillet, scramble the eggs and set aside.
2. **Sear Steak**: Season and sear the steak in batches, then set aside.
3. **Sauté Aromatics**: Sauté green onions, ginger, and garlic in the skillet, then incorporate the vegetables.
4. **Brown Rice**: Add cold rice to the skillet, browning it before mixing in the other ingredients and heating through.
### Cooking Tips
– Cook the steak in two batches to guarantee proper searing.
– Cook the eggs until just set for a shiny finish.
– If the rice is clumpy, break it apart before adding to the pan.
– Let the rice cook undisturbed for a few minutes to develop a crispy texture.
– Drizzle soy sauce around the edge of the pan for a sizzling effect.
## Storage and Reheating
Store leftovers in an airtight container in the refrigerator for up to 4 days or freeze for a maximum of 2 months. To reheat, thaw overnight in the fridge and warm in a covered skillet with a splash of water, then uncover and add a little oil to re-crisp.
## Conclusion
Steak Fried Rice is a fantastic method to utilize leftover steak while crafting a quick and delicious meal. With its savory tastes and satisfying texture, it’s destined to become a staple in your dinner lineup. Enjoy this adaptable dish on its own or with a refreshing side for a complete meal.
Read More
Revised Black Bean Confetti Salad Recipe
### Black Bean Confetti Salad 2.0: A Spring Delight
Spring possesses an enchanting ability to awaken our senses, and nothing captures that vibrancy quite like a lively salad. Recently, I had the joy of experiencing true springtime in Paris, where the blooming magnolia trees and animated outdoor ambiance inspired me to recreate that warmth in my kitchen. This inspiration led to a revamped version of a cherished recipe: the Black Bean Confetti Salad 2.0.
#### The Inspiration
While traveling, the sights and sounds of Paris revitalized my spirit. The Jardin du Palais Royal was embellished with vibrant blooms, and the city’s energy was infectious. Upon returning to New York City, I felt inspired to infuse that springtime delight into my meals. My friends cautioned me about the potential for a “false spring,” but I was resolute in embracing the season in both my heart and on my plate.
#### Recipe Overview
This salad features a delightful blend of textures and flavors, making it ideal for both casual get-togethers and quick lunches. It includes black beans, a variety of colorful bell peppers, zesty jalapeños, crisp radishes, and creamy avocado, all combined with a tangy lime dressing. The addition of cilantro and a dash of chili powder or tajín enhances the dish, providing a feast for the senses.
#### Ingredients
– 2 (15-ounce) cans black beans, drained and rinsed
– 3 bell peppers (mixed colors), diced
– 1 to 2 jalapeños, finely chopped (to taste)
– 1/4 large or 1/2 medium white onion, finely chopped
– A few radishes, finely chopped (watermelon radish adds a nice touch)
– 4 tablespoons olive oil
– Juice of 1 to 2 limes (to taste)
– Kosher salt
– Chili powder or tajín (a mixture of chili powder, lime, and salt)
– About 1/2 cup fresh cilantro, chopped
– 2 firm-ripe avocados, peeled and diced
– Tortilla chips for serving (optional)
#### Directions
1. In a large bowl, mix the black beans, bell peppers, jalapeños, onion, and radishes.
2. Drizzle the mixture with olive oil, the juice of one lime, 1 teaspoon of kosher salt, and chili powder or tajín to taste.
3. Carefully fold in the cilantro and diced avocado.
4. Taste the salad and make adjustments with more lime juice and salt as necessary.
5. Serve immediately, enjoying it with tortilla chips if desired. Leftovers can be refrigerated for a few days.
#### Conclusion
The Black Bean Confetti Salad 2.0 is not merely a dish; it’s a festivity celebrating the arrival of spring. It’s versatile enough to work as a party snack, a light lunch, or a dinner side. With its colorful components and refreshing flavors, this salad will undoubtedly add a hint of spring to your table, regardless of the season. Relish the explosion of flavors and the joy it brings, just as I did during my Parisian adventure.
Read More
Tacos Stuffed with Salmon and Drizzled with Creamy Avocado Sauce
These charred salmon tacos are filled with vibrant, fresh tastes: seasoned fish, pineapple pico, and a rich avocado sauce that comes together in merely 30 minutes! An ideal dinner for a weeknight or gatherings.
If there’s one meal that always goes over well in my home, it’s tacos. Here’s my latest favorite taco recipe: these salmon tacos with smooth avocado sauce! They’re overflowing with fresh, zesty flavor, combining blackened salmon with pineapple pico and a lively green creamy sauce.
This simple, healthy dinner truly tastes like it’s from a restaurant (at least, according to one reader who adored them!). And best of all, you can prepare it in about 30 minutes. It’s a dinnertime victory that satisfies everyone in my household.
5 Star Reader Review
⭐⭐⭐⭐⭐ “These are ABSOLUTELY delicious! My husband and I can’t stop talking about them. They are restaurant quality. Plan to make these a regular meal for entertaining.” -Melissa
What You Need for Salmon Tacos
Tacos are a classic Mexican dish that has existed for centuries, but the contemporary fish taco originated in the 1950s in Mexico’s Baja California region. The towns of Ensenada and San Felipe both assert they created them, and the trend quickly spread across the border to San Diego. A man named Ralph Rubio fell in love with the tacos, and his Rubio’s Fresh Mexican Grill has sold over 50 million fish tacos since its inception in the 1980s.
These salmon tacos are a variation on the traditional fish taco, but the fish is blackened rather than battered. They’re wrapped in a tortilla with a vibrant avocado lime sauce that embodies tangy, creamy goodness. Here’s what you’ll require:
- Salmon fillets: Skin-on works best for searing; opt for wild-caught if possible
- Spice rub: Simply use cumin, chili powder, smoked paprika, and garlic powder
- Olive oil, butter, and lime juice: These are used for searing the salmon
- Avocado sauce: A straightforward avocado sauce made with ripe avocado, Greek yogurt, lime, and cilantro
- Pineapple pico: Chopped fresh pineapple combined with store-bought pico de gallo
- Flour or corn tortillas: I generally prefer flour tortillas, but corn are excellent for gluten-free diets
- Red onion and cilantro: Just for garnish
Tips for Perfect Blackened Salmon
The fish in this salmon tacos recipe is pan-seared in a skillet, creating the best outer blackened layer of spices! Here are several tips for achieving blackened salmon:
- A cast iron or stainless steel skillet provides the best sear. The optimal way to achieve the blackened appearance on the exterior of the fish is with a cast iron or stainless surface, which enhances the Maillard reaction (browning or caramelization of the outer fish). Don’t fret if you only have a non-stick skillet: it will still deliver great flavor! You just won’t achieve that delightful char.
- First, allow the salmon to reach room temperature. This may seem like a step that can be overlooked by impatient cooks (like myself!), but resist the urge! If you sear it straight from the fridge, the inner part will remain cold while the outer side cooks.
- A food thermometer is beneficial. The simplest way to cook the salmon perfectly is by checking its internal temperature. It should read 125 to 130°F when measured at its thickest point.
- If the fish is not…
Read More

Recipe for Slim Crust Pizza Dough
Alex & Sonja Overhiser: The Creative Team Behind A Couple Cooks
Alex and Sonja Overhiser are the inventive pair behind the beloved culinary site, A Couple Cooks. As the authors of two acclaimed cookbooks and busy parents, they have successfully established themselves in the realm of food blogging by conveying their enthusiasm for uncomplicated, seasonal dishes and the happiness of preparing meals together.
The couple’s venture into the culinary scene started in 2010 with the launch of A Couple Cooks. Their objective was straightforward: to motivate others to view cooking as a delightful and rewarding pursuit. Throughout the years, they have compiled an extensive archive of thousands of original recipes, all crafted with a focus on simplicity and seasonality. Each recipe is carefully composed and beautifully photographed by Alex and Sonja themselves, making their personal touch evident in every post.
What distinguishes Alex and Sonja is their dedication to genuineness and family. As partners who cook together in real life, they bring a distinctive viewpoint to their work. Their recipes undergo testing not just by them, but also by their children, guaranteeing that each dish is family-friendly and accessible to cooks of varying skill levels. This hands-on method has struck a chord with their audience, acquiring them a devoted following of home cooks in search of dependable and delicious meal suggestions.
Apart from their online endeavors, Alex and Sonja have written two cookbooks that further highlight their culinary knowledge and philosophy. These publications provide readers a more in-depth look into their culinary world, sharing insights into their favorite recipes, cooking advice, and meal planning techniques. Through their endeavors, they persist in inspiring others to explore the delights of cooking and to craft memorable meals with cherished ones.
Whether you’re an experienced chef or a beginner in the kitchen, Alex and Sonja Overhiser’s A Couple Cooks serves as an invaluable resource for anyone aiming to refine their culinary abilities and savor the cooking experience. With their approachable demeanor and commitment to excellence, they have become respected figures in the food blogging community, motivating numerous individuals to discover the joy of cooking at home.
Read More
A Comprehensive Guide to Preparing Broccoli
Alex & Sonja: The Culinary Partners Behind A Couple Cooks
Introducing Alex and Sonja Overhiser, the energetic husband-and-wife duo who have transformed their love for cooking into a cherished online haven for culinary aficionados. As the creators of two celebrated cookbooks and the masterminds behind the popular platform A Couple Cooks, Alex and Sonja have been motivating home chefs since 2010 with their straightforward, seasonal dishes and contagious enthusiasm for the culinary field.
Alex and Sonja’s foray into the realm of food blogging commenced with a mutual aspiration to delve into the pleasures of cooking together. As busy parents, they recognize the hurdles of crafting nutritious meals amidst the chaos of everyday life. Their website, A Couple Cooks, emerged from a dedication to make cooking both approachable and enjoyable for all, regardless of their culinary skill level.
Throughout the years, A Couple Cooks has expanded into an extensive hub for food enthusiasts, presenting thousands of unique recipes that highlight fresh, seasonal produce. From swift weeknight meals to intricate holiday spreads, Alex and Sonja’s creations appeal to a diverse array of tastes and dietary needs. Every recipe is carefully designed, tested on their own family, and aesthetically photographed to motivate others to engage in cooking.
In addition to recipes, Alex and Sonja share valuable cooking insights and meal planning suggestions to assist readers in streamlining their kitchen practices. Their friendly tone and practical tips make it simple for even beginner cooks to feel self-assured in the kitchen. Whether you aim to perfect the art of sourdough baking or quickly toss together a salad for lunch, A Couple Cooks caters to everyone.
Beyond their digital footprint, Alex and Sonja have penned two cookbooks that further highlight their culinary knowledge and creativity. These publications stand as a proof of their commitment to advocating for healthy, homemade meals that unite families around the dining table.
As a real-life couple who cooks together, Alex and Sonja embody the notion that cooking can be a delightful, shared journey. Their collaboration in the kitchen is a reflection of the strength of teamwork and the belief that great food has the power to unite individuals and forge enduring memories.
Whether you are an experienced chef or just embarking on your culinary adventure, Alex and Sonja Overhiser welcome you to join them in exploring the joys of cooking. With their support, you will discover that creating delicious, nutritious meals is not only possible but also incredibly fulfilling.
Read More